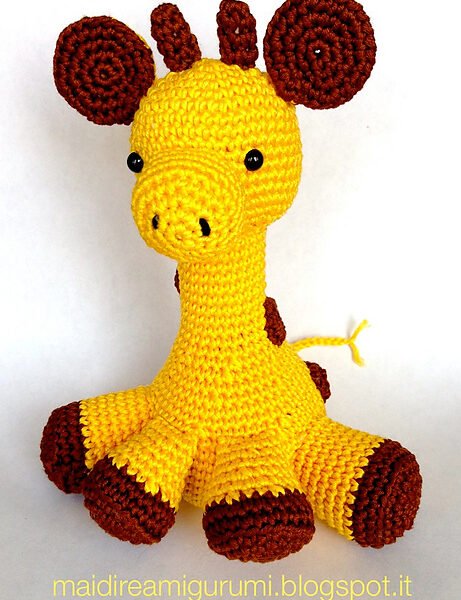
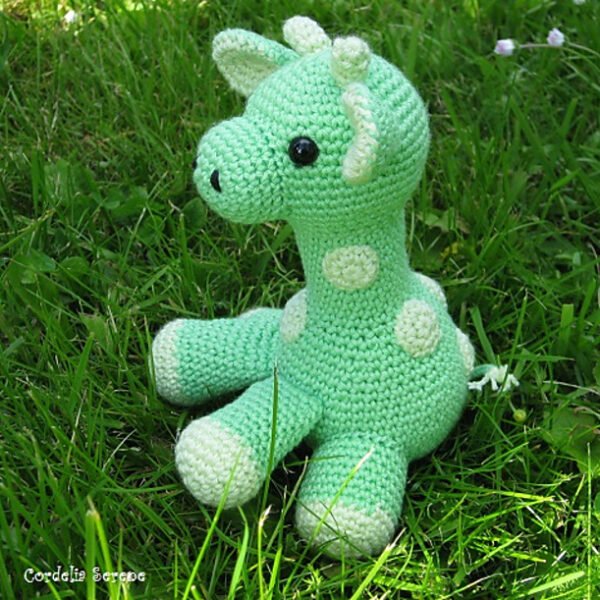
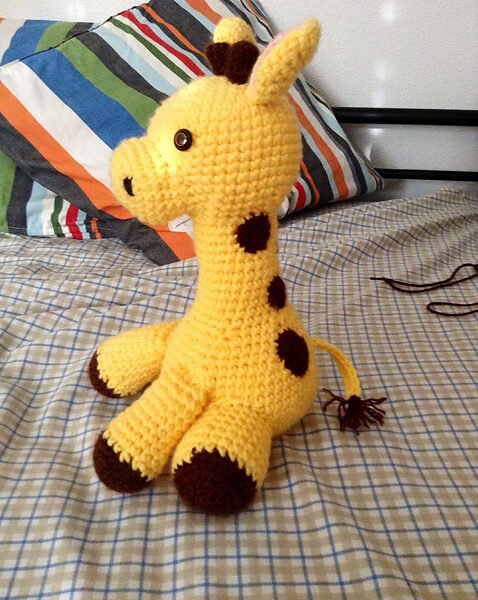
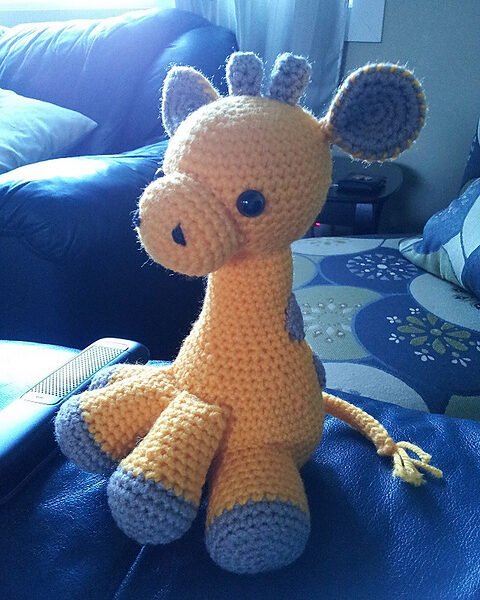
Babie Giraffes Amigurumi Free Pattern. Hello friends and readers of the My Crafts Inspirations blog, how are you? It’s always great to have you here on our blog to inspire us in this incredible art that is crochet. Well, today I bring here a beautiful pattern that I believe will delight everyone, The Babie Giraffes Amigurumi Pattern. This beautiful amigurumi is perfect for decorating our little babies’ cribs as well as for them to play with. I hope you like this topic and share it with your friends.
Babie Giraffes Amigurumi Free Pattern
Written byadmin in
Opting for baby giraffes serves as an excellent decision, whether the goal is to gift them or to enhance the charm of our little ones’ rooms. Amigurumis, widely cherished in the realm of crochet, offer a splendid avenue for honing our skills and expanding our expertise. Embrace this delightful suggestion and embark on an enjoyable journey of creating these charming giraffes that are bound to add a touch of beauty to your crochet endeavors.
Amigurumi, the Japanese art of knitting or crocheting small stuffed animals and creatures, has gained immense popularity worldwide. These charming and adorable creations are not just toys; they’re expressions of creativity and love. One such delightful pattern that has captured the hearts of crafters is the Babie Giraffes Amigurumi Pattern. In this article, we’ll explore the charm and intricacies of creating these cute miniature giraffes.
Materials:
4-ply medium worsted weight yarn in two tones (e.g., golden yellow for the body and brown for accents)
Safety eyes (9-10 mm) or black yarn/buttons
3.5mm Hook or E hook (gauge is not crucial)
Fiberfill for stuffing
Abbreviations:
FO: Fasten Off (Using a slip stitch to reduce bulk and then cutting)
SC: Single Crochet
SS: Slip Stitch
MR: Magic Ring
CH: Chain
BLO: Back Loops Only
FLO: Front Loops Only
dec: Decrease (2 Single Crochets together)
inc: Increase (2 Single Crochets in one stitch)
[ ]: Repeat everything in the brackets for the round
Tutorial:
Body:
CH 2 or MR, whichever you prefer.
6 SC in the ring.
Inc in every SC (12).
[SC, inc] (18).
[2 SC, inc] (24).
[3 SC, inc] (30).
[4 SC, inc] (36).
[5 SC, inc] (42).
[6 SC, inc] (48).
[7 SC, inc] (54).
SC around for 7 rounds (54).
[7 SC, dec] (48).
[6 SC, dec] (42).
SC around for 2 rounds (42).
[5 SC, dec] (36).
SC around once (36).
[4 SC, dec] (30).
[3 SC, dec] (24).
SC around for 11 rounds (24).
FO.
Head:
CH 2 or MR, whichever you prefer.
6 SC in the ring.
Inc in every SC (12).
[SC, inc] (18).
[2 SC, inc] (24).
[3 SC, inc] (30).
[4 SC, inc] (36).
[5 SC, inc] (42).
SC around for 8 rounds (42).
[5 SC, dec] (36).
[4 SC, dec] (30).
[3 SC, dec] (24).
FO, leaving a long tail for sewing.
Snout:
CH 2 or MR, whichever you prefer.
6 SC in the ring.
Inc in every SC (12).
[SC, inc] (18).
[2 SC, inc] (24).
SC around for 4 rounds (24).
FO, leaving a long tail for sewing.
Ears (Make 4 circles; 2 in each color):
CH 2 or MR, whichever you prefer.
6 SC in the ring.
Inc in every SC (12).
[SC, inc] (18).
[2 SC, inc] (24).
FO, leaving a long tail for sewing.
Sew two colors together with a whip stitch around the edges and pinch at the ends to sew to the side of the head.
Horns (Make 2):
CH 2 or MR, whichever you prefer.
6 SC in the ring.
SC around for 3 rounds (6).
FO, leaving a tail for sewing.
Legs (Make 2 back legs):
CH 2 or MR, whichever you prefer.
6 SC in the ring.
Inc in every SC (12).
[SC, inc] (18).
[2 SC, inc] (24).
BLO SC around once (24).
SC around in both loops (24).
Change color.
SC around for 7 rounds (24).
FO, leaving a long tail for sewing.
Arms (Make 2):
CH 2 or MR, whichever you prefer.
6 SC in the ring.
Inc in every SC (12).
[SC, inc] (18).
[2 SC, inc] (24).
SC around for 2 rounds (24).
Change color.
[2 SC, dec] (18).
SC around once (18).
[4 SC, dec] (15).
SC around for 5 rounds (15).
[3 SC, dec] (12).
SC around once (12).
FO, leaving a tail for sewing.
Pinch the arm flat and sew along the seams before sewing to the body.
Spots: Make as many spots as you desire.
CH 2 or MR, whichever you prefer.
6 SC in the ring.
Inc in every SC (12).
FO, leaving a long tail for sewing.
Tail:
CH 21.
SC in 2nd ch from hook and all the way to the end for 20 SC. Ch1 turn.
SC in FLO across (20 SC). CH1 and turn.
Folding your work in half lengthwise, SC in the FLO and the other side of the beginning chain to close the edges. Alternatively, Fasten off after Row 2 and whip stitch the edges together.
Leave a tail to sew to the giraffe’s rump.
Babie Giraffes Amigurumi Pattern
Did you like this pattern and want to see the PDF about it? See the tutorial made by ravelry.com
Access the PDF/ Baby Giraffe Amigurumi
The My Crafts Inspirations team would like to thank each reader for following us this far, we wish you much success with this wonderful pattern and we hope to help you with our next crochet suggestion. To the next!
You Are Here: