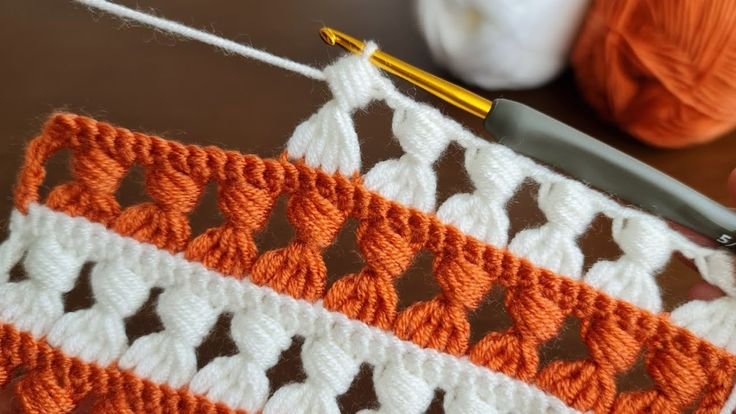
Welcome to today’s crochet tutorial! If you’re looking for a beautiful yet easy crochet pattern to add to your repertoire, you’ve come to the right place. In this post, I’ll be guiding you through a simple yet stunning crochet design that’s perfect for a variety of projects, from cozy shawls to elegant baby blankets.
Bead Stitch Free Pattern
This pattern uses two colors of yarn and is made with basic stitches like single crochet, half treble crochet, and the ever-popular puff stitch. Whether you’re a seasoned crocheter or a beginner looking to expand your skills, this pattern will bring joy to your crafting sessions!
Materials Needed:
yarn (2 colors)
3mm crochet hook

Bead Stitch Free Pattern
Step 1: Foundation Chain
Start by creating a foundation chain using the desired width of your project. For the example, a chain of 17 stitches was used, which is a multiple of 4 plus 1.
Once the chain is done, make sure you have enough to work with for your project.
Step 2: First Row – Single Crochet
Work in single crochet (s.c) across the foundation chain:
Insert your hook into the second chain from the hook and make a single crochet.
Continue making single crochets in each chain stitch across.
When you reach the end of the chain, you should have a total of 17 single crochets (this is based on 4 multiples + 1).
Step 3: Starting the Model
For the next step, chain 6 stitches.
Turn your work and yarn over twice (making two loops on the hook).
Insert your hook into the back half of the previous single crochet stitch, and make a half treble crochet (h.t.c) by pulling through and working two loops at a time.
Repeat this for the next 3 stitches, working a total of 4 half treble crochets.
After completing all 4 half trebles, yarn over and pull through all the loops on the hook to close the shape.
Then, close the remaining two stitches.
Step 4: Adding the Puff Stitch
For the next part, yarn over and insert your hook into the space between the stitches.
Make a puff stitch by wrapping the yarn around the hook 4 times and pulling through all the loops at once. Close it with a chain stitch.
Yarn over twice again, and repeat the process as before by working into the back half of the stitches (opposite of the front side of your work).
Complete the puff stitch again, close the shape, and repeat the process across the row.
Step 5: Continuing the Pattern
Continue working across the row, alternating between half treble crochets and puff stitches.
After finishing the puff stitch, make sure to close each group of stitches as you go.
Step 6: Switching to the Second Color
To add the second color, fasten off the first color and join the second color yarn.
Chain 6 stitches, turn the work, and repeat the steps from Step 3 to continue creating the pattern with the new color.
Continue alternating between the two colors as desired for the project.
Step 7: Finishing
Complete the pattern by working the rows in the same way, alternating the stitches and colors as per your design.
Finish by weaving in any loose ends and securing the yarn.
Video Tutorial:
You might also be interested
You Are Here: