The holiday season is the perfect time to add a little handmade charm to your Christmas tree, and what better way to do that than with a delightful Crochet Christmas Tree Angel? This beautiful angel will not only brighten up your tree but also make a thoughtful, personalized gift for family and friends. Whether you’re an experienced crocheter or just starting out, this pattern is simple to follow and will give you a gorgeous, festive ornament to cherish for years to come.
Crochet Christmas Tree Angel Free Pattern
In this step-by-step guide, you’ll learn how to crochet the angel’s head, collar, body, and hat, plus how to assemble them into a lovely ornament ready to hang on your tree. Let’s dive into this fun and festive project that’s perfect for the holiday season!
Materials You’ll Need:
Crochet yarn in your choice of colors (white or gold for a traditional look)
Crochet hook (recommended size: 2.5mm)
Yarn needle
Fiberfill stuffing
Scissors
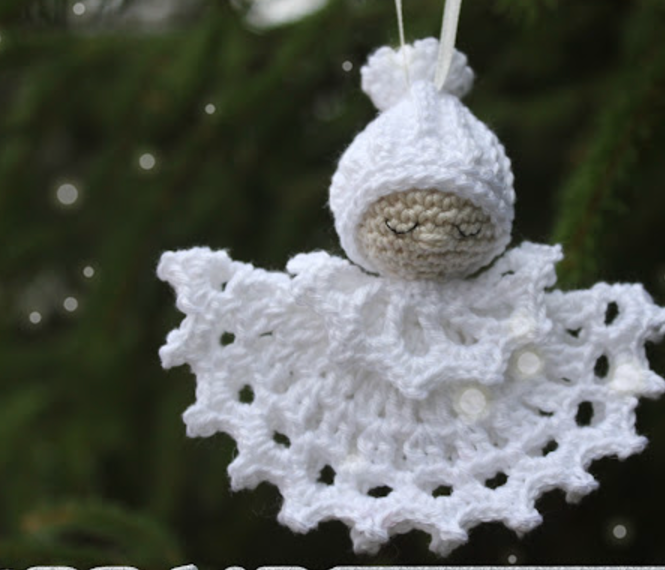
Crochet Christmas Tree Angel Free Pattern
Head:
Start with 2 chain stitches (ch) or make a magic ring.
Round 1: Crochet 6 single crochet (sc) in the 2nd ch from the hook or in the magic ring.
Round 2: 2 sc in each stitch around.
Round 3: 1 sc, 2 sc in the next stitch around.
Round 4: 2 sc, 2 sc in the next stitch around.
Rounds 5-8: 1 sc in each stitch around.
Round 9: 2 sc, 2 sc in the next stitch around.
Round 10: 1 sc, 2 sc in the next stitch around.
At this point, stuff the head with cotton or fiberfill.
Round 11: 2 sc in each stitch around.
Finish off by leaving a piece of yarn for sewing the head to the body later.
Collar:
Crochet 5 ch and join into a ring with 1 sc (or make a magic ring).
Round 1: 3 ch (= 1st), crochet 11 sc in the ring. Join with 1 slip stitch (slst) into the 3rd ch from the start of the round. (12 stitches)
Round 2: 3 ch (= 1st), 4 ch, 1 sc in the next stitch repeat from * to * around. Finish with 4 ch, 1 slst in the 3rd ch from the start. (12 pieces, 12 ch rings)
Round 3: 1 slst around the 4-ch ring, 1 ch (= 1 sc), 1 sc, 2 ch, 2 sc around the same 4-ch ring. 2 sc, 2 ch, 2 sc around the next 4-ch ring.
Finish off and save a piece of yarn for sewing the collar to the body.
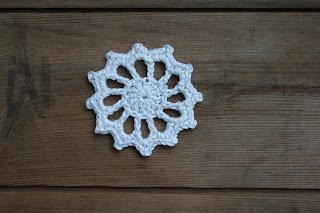
.
Body:
Crochet 5 ch and join into a ring with 1 sc (or make a magic ring).
Round 1: 3 ch (= 1st), crochet 11 sc in the ring. Join with 1 slst into the 3rd ch. (12 stitches)
Round 2: 3 ch (= 1st), 1 sc in the same stitch, 2 sc in each stitch around. Join with 1 slst in the 3rd ch. (24 stitches)
Round 3: 1 ch (= 1 sc), 1 sc in each stitch. Join with 1 slst in the 1st ch (24 stitches). The work should bend slightly but will straighten out later.
Round 4: 3 ch (= 1st), 1 sc in the same stitch, 1 ch, 2 sc in the next stitch, 1 ch around. Finish with 1 slst in the 3rd ch. (48 stitches)
Round 5: Slst into a 1-ring, 3 ch (= 1st), 1 sc in the same stitch, 2 ch. 2 sc in the next 1-ch ring, 2 ch. Finish with 1 slst in the 3rd ch. (24 stitches, 24 ch loops)
Round 6: Slst into the 2-ch ring, 1 ch (= 1 sc), 4 ch. 1 sc in the next 2-ch ring, 4 ch. Finish with 1 slst in the 1st ch. (24 sc, 24 ch rings)
Round 7: Slst into the 4-ch ring, 1 ch (= 1 sc), 1 sc, 2 ch, 2 sc in the same 4-ch ring. 2 sc, 2 ch, 2 sc in the next 4-ch ring. Finish with 1 slst in the 1st ch.
Finish off and save yarn for sewing.
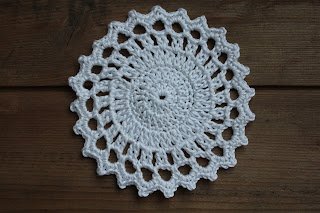
.
Cap:
Cast on 11 ch, turn, and crochet 1 sc in each stitch (in the back loop).
Start in the 2nd ch from the hook. You should have 10 sc in one round.
Turn with 1 ch and continue to crochet 1 sc in each stitch.
Repeat until you have about 24 rounds. Measure to ensure it fits snugly around the angel’s head.
Fasten off the yarn. Create a small mouse button effect by tightening the yarn below the rim of the hat, wrapping around a few times and tying a knot.
Crochet a round of sc along the bottom edge of the hat and make a loop in the seam.
Finish with a round of sc and a slst to close.
Save yarn to attach the hat to the head later.
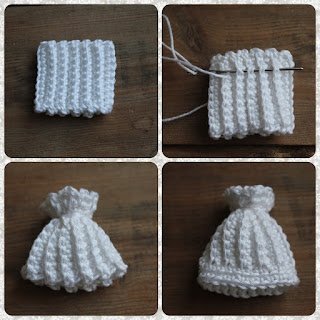
.
Assembly:
Sew the head to the collar, ensuring that the center holes align.
Attach the collar to the body, keeping the top holes aligned.
Embroider a small nose by sewing back and forth in the same spot a few times.
Use black yarn to embroider the eyes.
Place the hat on the head and secure it with a few small stitches.
Add a string or ribbon to the top of the hat for hanging the angel as an ornament.
This sweet little angel is now ready to hang on your Christmas tree or to give as a handmade gift. With its delicate features and charming design, it’s sure to bring extra joy to your holiday season. Happy crocheting and Merry Christmas!
You might also be interested
You Are Here:
