A small heart at the center of a quilt block can make an entire project feel personal. In the Kindred Rose Block, that heart sits within a balanced arrangement of framed corners and rectangular patches, giving the design both a gentle focal point and a strong geometric structure. It is a lovely choice for a quilt made to celebrate friendship, family, or someone who feels like home.
Kindred Rose Block Pattern
Written byadmin in
Designed by Jessica Rose of Quiltd Studios for Moda Blockheads 7, Kindred Rose is Block 4 in the series. The pattern offers four finished sizes, allowing you to use the same design in projects ranging from a small sampler to a large cushion or quilt. At the end of this article, you will find the PDF with the cutting chart, illustrated assembly steps, and measurements for every size.
The central heart is the detail that draws your eye first. It is pieced from two mirrored halves, with small diagonal corners shaping its upper curves and lower point. Around it, four side units and four corner units form a three-by-three arrangement.
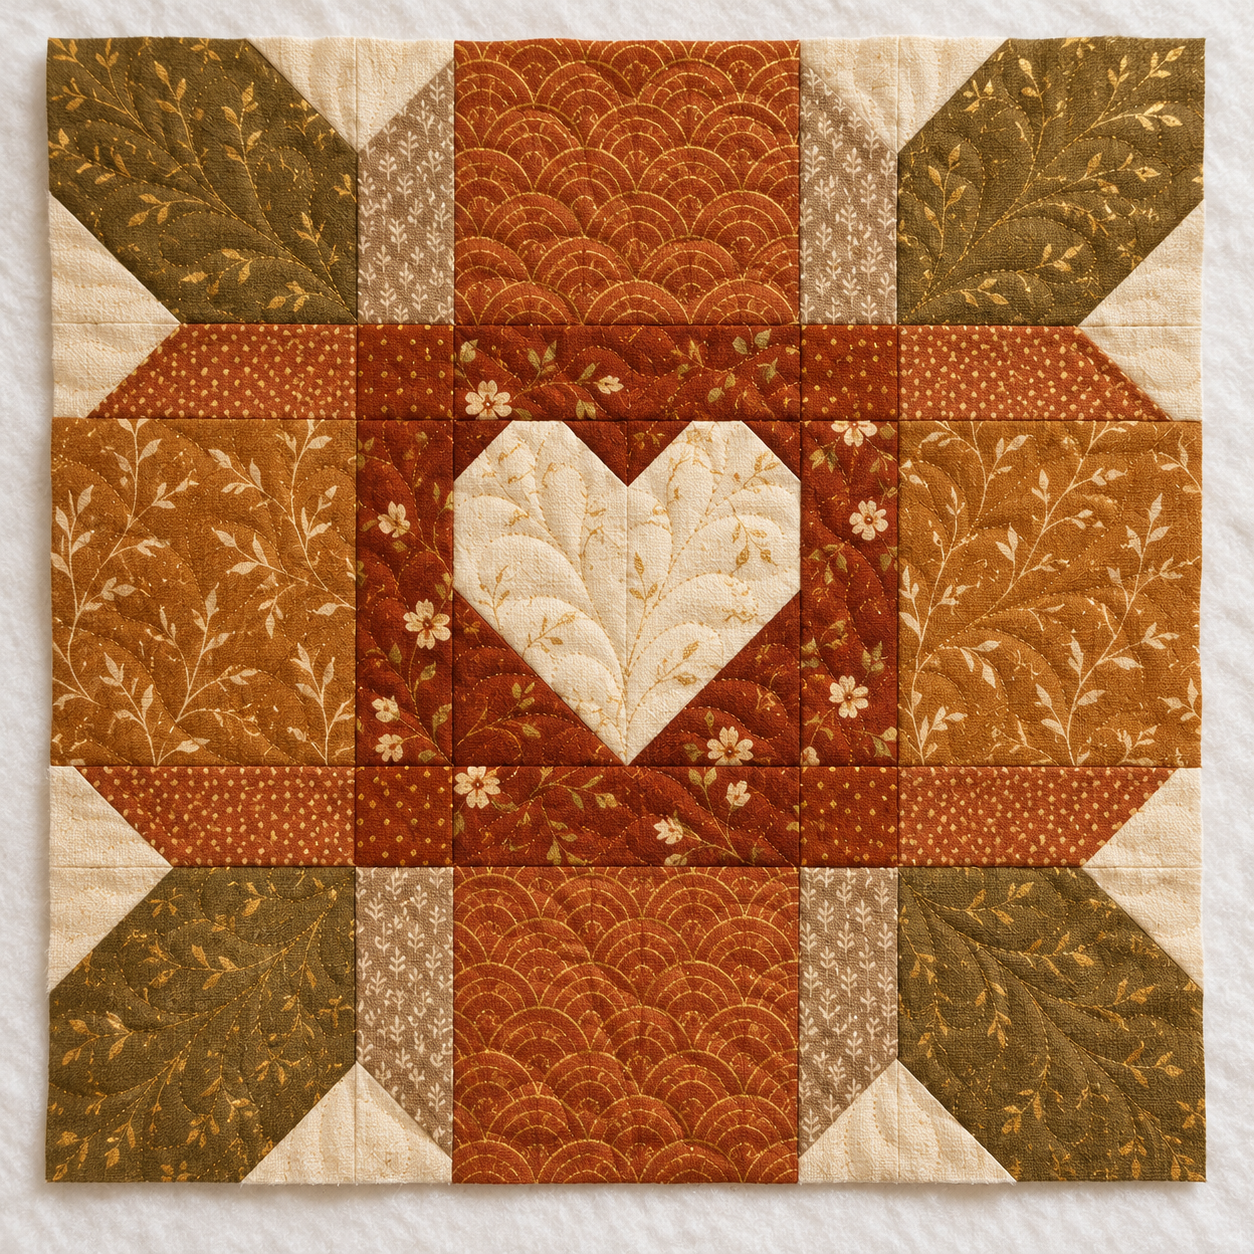
Kindred Rose Block Pattern
In the pattern illustration, a pale heart rests against a deeper pink background. Dark corner squares give the design definition, while narrow strips connect the smaller details around the center. That balance makes Kindred Rose especially enjoyable to recolor. A few fabric changes can bring the heart forward, soften the surrounding frame, or emphasize the four corners.
Choosing Fabrics for Kindred Rose
Begin with the heart and the fabric immediately surrounding it. Choose a combination with enough contrast that the heart remains visible when you step away from your sewing table. Blush against dusty rose creates a gentle effect, while ivory against burgundy makes the shape more pronounced.
Next, audition your corner fabrics. A navy, forest green, or deep plum print can anchor a softer center. Small florals and subtle textures work well in the narrow pieces because their patterns remain visible after cutting. If you choose a larger floral, consider how much of each flower will fit inside the individual patches.
Before cutting, lay small samples together in approximately the same positions as the block diagram. This helps you judge the relationships between colors. A photograph of the arrangement also gives you a reference while you work.
Four Block Sizes to Choose From
The PDF provides cutting instructions for four finished block sizes. The extra half inch in the assembled measurement accounts for the seam allowances around the outside.
| Finished block size | Measurement before joining |
|---|---|
| 9 × 9 inches | 9½ × 9½ inches |
| 12 × 12 inches | 12½ × 12½ inches |
| 18 × 18 inches | 18½ × 18½ inches |
| 24 × 24 inches | 24½ × 24½ inches |
Choose your size before preparing the fabric, and follow that column throughout the cutting chart. Highlighting the selected column on a printed copy can help you keep track of the measurements.
The larger versions give you more room to handle the small diagonal pieces. The 9-inch version creates a delicate result, with correspondingly smaller patches that reward careful cutting and pressing.
What to Expect During Assembly
Kindred Rose uses squares and rectangles with diagonally sewn corner patches. The construction begins with the corner units, followed by the side units and the heart. Once these sections are ready, the block comes together in three rows.
Pay particular attention to the left and right pieces. Several units are mirror images, and their diagonals must face the correct direction. Keep the diagram beside your machine and arrange each pair before stitching. For the heart, laying the two halves next to each other makes it easier to see whether the point and upper corners will meet correctly.
After sewing a diagonal corner, fold the fabric open and check the shape before trimming the excess. Press gently, then compare the unit with the measurement listed for your chosen size. Checking as you go helps prevent small differences from accumulating in the final rows.
Pressing and Placement Make a Difference
The pattern gives pressing directions and also allows seams to be pressed open. Follow the guidance for each unit and take time at intersections where several seams meet. Lower and lift the iron so the small pieces keep their shape.
Before joining the final rows, place all nine units on a flat surface. Check the direction of the corner units, the position of the narrow accent strips, and the orientation of the heart. A quick photograph preserves the layout as you carry pieces to the machine.
Ideas for Your Finished Block
A single Kindred Rose Block can become the centerpiece of a cushion, a quilted wall hanging, or a small table topper with added borders. Repeating it across a quilt creates a collection of hearts, each of which can carry a different color combination.
For a friendship quilt, invite each maker to choose fabrics from a shared palette. Keeping one background fabric consistent can help the blocks sit comfortably together while allowing individual choices to show. For a personal gift, select colors that remind you of the recipient, perhaps a favorite flower, a room in their home, or a piece of fabric with a shared history.
Download the Kindred Rose Block PDF
Ready to make your own Kindred Rose Block? The PDF includes the cutting chart for all four sizes, diagrams for the mirrored units, pressing guidance, and the final assembly layout.
When combining several Kindred Rose Blocks, try arranging them on a design wall before deciding on the final layout. Simple sashing can give each heart a little breathing room and keep the surrounding patchwork clearly defined. For a softer overall effect, choose sashing close in color to the block backgrounds; a contrasting fabric will create a more visible grid around the individual blocks.
Download the Kindred Rose Block PDF
Your quilting choices can add another layer of character to the finished project. Gentle curves in the background can complement the angular piecing, while straight lines can emphasize the geometric frame. If you want the central heart to remain the focal point, consider outlining its shape with quilting and using a quiet coordinating thread. Test your stitch length and tension on a small sandwich made with the same fabric, batting, and backing before you begin.
For a meaningful finishing touch, add a label to the back of your quilt or cushion with the date, the recipient’s name, and a short dedication. If you have used fabrics from previous projects, you might also record where those pieces came from. These little details preserve the story behind your Kindred Rose project and make it even more personal for the person who receives it.
You might also be interested
You Are Here: