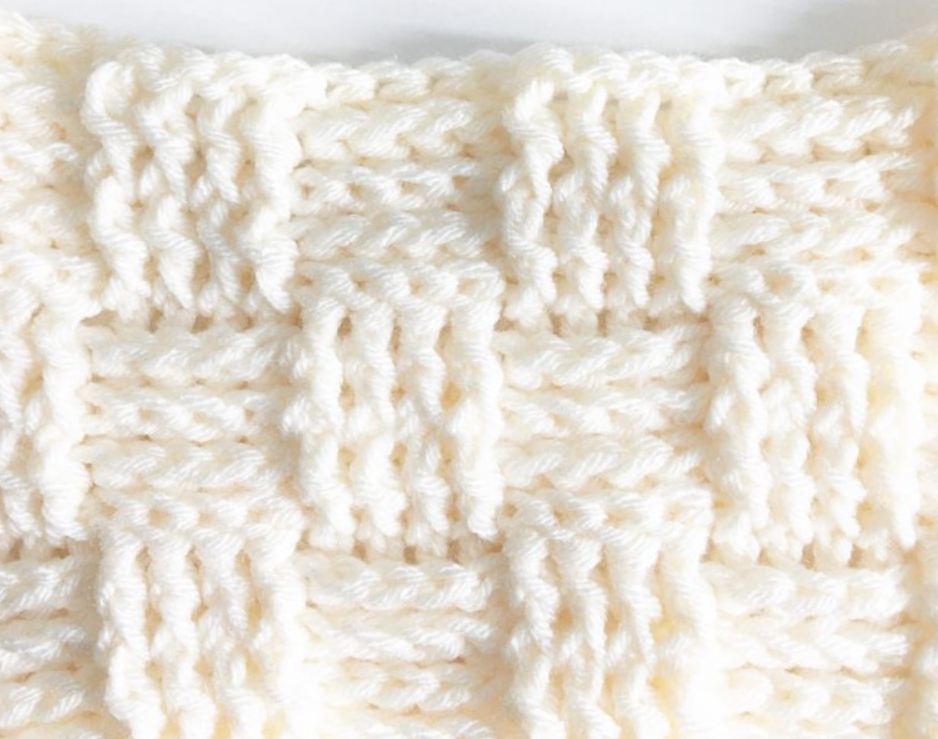
If you’re looking for a way to add texture and depth to your crochet projects, the Basketweave stitch is the perfect technique to learn. This stitch creates a bold, woven effect that is both visually striking and wonderfully tactile, making it ideal for cozy blankets, scarves, hats, and more. Whether you’re aiming to create a sophisticated look or a rustic charm, the Basketweave stitch can elevate any project with its interlocking blocks.
While the finished result may appear intricate, the Basketweave stitch is surprisingly straightforward, combining basic front post and back post double crochet stitches to form its signature pattern. It’s also an excellent gateway stitch for anyone interested in learning more advanced techniques like cables. So grab your yarn and hook, and let’s dive into this classic, timeless crochet stitch!

Basketweave Crochet Stitch
Materials:
Yarn of your choice (chunky yarn works well for this pattern)
Appropriate crochet hook for your yarn
Scissors
Tapestry needle
How to Crochet the Basketweave Stitch
To begin, make a chain in multiples of 8, then add 4 extra chains.
Row 1 (Foundation Row): In the 4th chain from the hook (the chain 3 counts as your first double crochet), make a double crochet (DC) into each stitch across. Chain 3 and turn your work.
Row 2 (Start of Basketweave Pattern): FPDC (Front Post Double Crochet) around the post of the next 4 DC’s.
BPDC (Back Post Double Crochet) around the post of the next 4 DC’s.
Alternate between FPDC and BPDC until you reach the last stitch.
In the last stitch, make a regular DC into the top of the turning chain (not around the post).
Chain 3 and turn.
Row 3: Repeat the FPDC around the post of the next 4 stitches and BPDC around the next 4 stitches.
Alternate until the end of the row, finishing with a DC into the top of the turning chain.
Chain 3 and turn.
Rows 4-5 (Repeat): Repeat the pattern two more times, or until you feel a square is made. If using chunky yarn, you may only need two rows.
Row 6 (Switching the Block Pattern): After chaining 3 and turning, start with BPDC around the post of the next 4 stitches, then FPDC around the next 4 stitches.
This alternates the appearance of the blocks.
Always end with a DC at the top of the turning chain.
Continue alternating your rows between the block sets to create a lovely woven texture. The Basketweave stitch gives your project a bold, structured look with added thickness.
Video Tutorial
Why Try the Basketweave Stitch?
Mastering this stitch not only adds a beautiful texture to your projects but also helps you develop the foundation for more intricate crochet techniques, like cable crochet.
This versatile stitch pattern looks complex but is easy to learn. Try it out and see how it transforms your crochet projects! Happy crocheting!