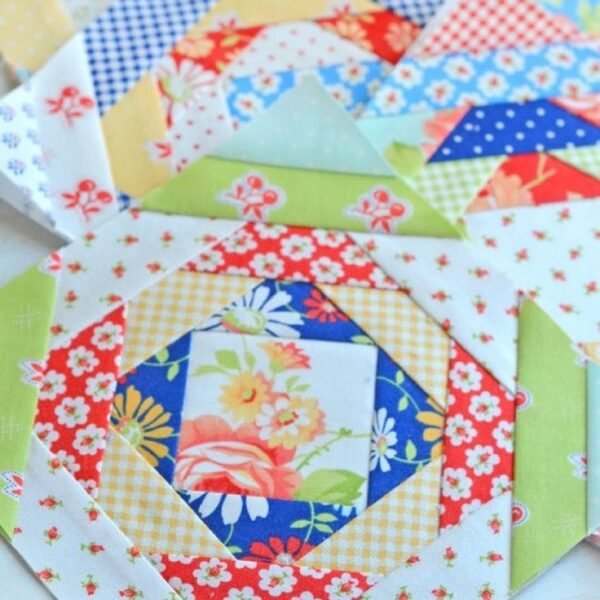
Welcome, craft enthusiasts, to another exciting crafting journey with My Crafts Inspirations! This time, we’re diving into the world of quilting with a vibrant and delightful theme – the Pineapple Quilt Block. Inspired by the tropical allure of pineapples, this tutorial will guide you through creating a stunning quilt block that adds a touch of exotic elegance to your next quilting project.
Pineapple Quilt Block Tutorial
Written byadmin in
Before you begin, make sure you have all your materials ready. Choose vibrant yellows for the pineapple body and various greens for the leaves to capture the essence of this tropical fruit. Don’t forget the background fabric to make those pineapples pop!
Cutting instructions for one block:
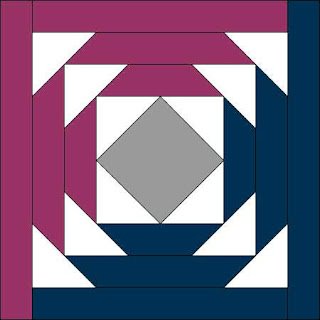
Gray for center square: 1 square 3 3/8″ (or 3 5/16″ to be exact). I like to use my On-Point ruler for cutting these types of on point squares that don’t fit exactly to our regular ruler measurements. With this ruler, you would use the 4″ finished diagonal measurement.
White: 2 squares 2 7/8″, cut once diagonally (You can cut these larger, like 3″ or 3 1/4″ if you like to trim/square up your center Square-in-a-Square unit)
White: 12 squares 2 1/2″
From EACH of 2 colors: one – 1 1/2″ x 4 1/2″; two – 1 1/2″ x 6 1/2″; two – 1 1/2″ x 8 1/2″; one – 1 1/2″ x 10 1/2″

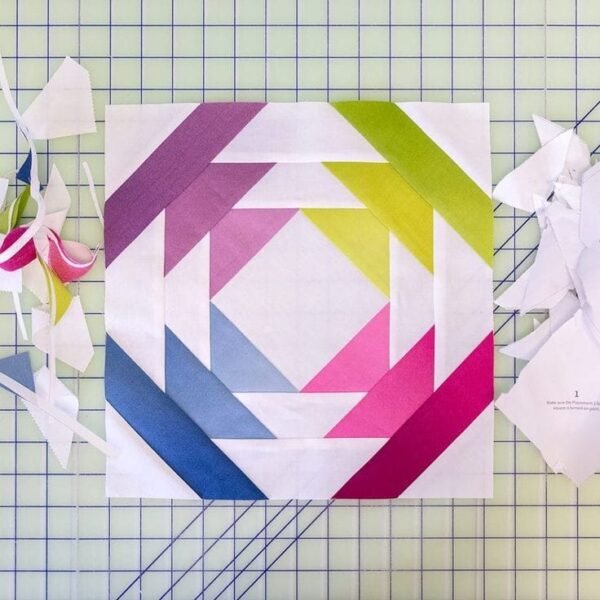
Block size 10″ finished {10 1/2″ unfinished}
Pineapple Quilt Block Step Step:
Use the scant 1/4″ seam allowance
Stitch and Flip Triangles are made by drawing a diagonal line on the wrong side of the 2 1/2″ squares, sewing on the line, trimming to 1/4″ seam allowance and pressing out.
Step 1- Make the Square-in-a-Square by sewing the 2 7/8″ triangles to opposite sides of the gray square. Press. Sew triangles to the remaining two sides and press. If you’ve oversized the white triangles, trim the unit to 4 1/2″ by placing the 2 1/4″ mark of the ruler on the center points.
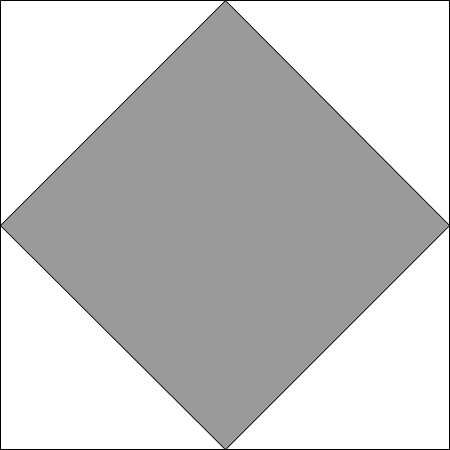
Step 1
Step 2 – Attach a 1 1/2″ x 4 1/2″ rectangle to the opposite sides of the unit from step 1. Then, sew a 1 1/2″ x 6 1/2″ rectangle to the remaining two sides, following the provided illustration.

Step 2
Step 3 – Utilize the Stitch and Flip method by placing a white 2 1/2″ square on each corner, forming a triangle on each corner.

Step 3
Step 4 – Add a 1 1/2″ x 6 1/2″ rectangle to opposite sides of the unit, as shown in the picture. Press. Repeat this step with the 1 1/2″ x 8 1/2″ rectangles.

Step 4
Step 5 – Repeat Step 3 to create a white triangle on each corner.

Step 5
Step 6 – Sew a 1 1/2″ x 8 1/2″ rectangle to opposite sides, following the provided illustration. Press. Repeat this process with the 1 1/2″ x 10 1/2″ rectangles.
Step 6
Step 7 – Once again, repeat Step 3 to create a white triangle at each corner of the block.

Step 7
And there you have it! No need for paper piecing or intricate trimming!
To access the PDF of the pattern and start your next block project, access the PDF below and let the needle magic begin!
Access the PDF/ Pineapple Quilt Block PDF
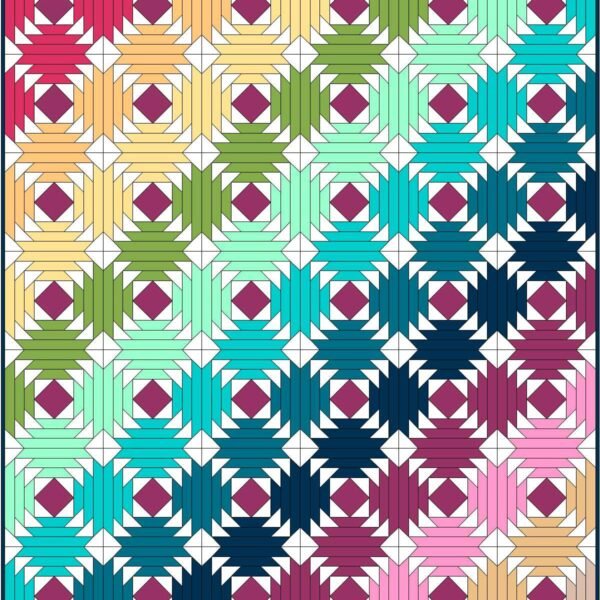
Dear friend and reader, did you like this beautiful pattern? Excellent! I have a wonderful suggestion for a beautiful, colorful and fun pattern that will certainly please you a lot. You can check it out here below:
Bargello All Tangled Up Quilt Pattern
You might also be interested
You Are Here: