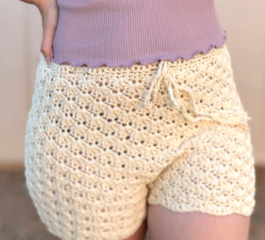
If you’re looking for a crochet stitch that adds texture and depth to your projects, the Bean Stitch is an excellent choice. Its raised, fluffy look gives dimension to blankets, scarves, and other cozy creations. In this article, I’ll walk you through how to crochet the Bean Stitch, tips for success, and its versatility in different projects.
The Bean Stitch Pattern
The Bean Stitch is a dense, textured crochet stitch that creates small “bean”-like loops, giving your work a cozy, quilted appearance. It’s perfect for items that need a little extra warmth or texture, like afghans, baby blankets, or cowls.
Stitches You’ll Need:
- Chain (ch): A basic crochet stitch used as the foundation for most projects.
- Slip Stitch (sl st): Often used to join rounds or move across stitches without adding height.

The Bean Stitch Pattern
Tip: Always use the recommended hook size listed on the yarn label to ensure your project has the best tension and structure.
How to Crochet the Bean Stitch
Here’s a step-by-step guide to crochet the Bean Stitch:
Start with the foundation chain: You will need to chain an odd number of chains, plus 2 more. For a sample swatch, begin by chaining 31.
Bean Stitch Instructions: Insert your hook into the indicated stitch or space.
Yarn over (yo) and pull through the stitch or space. Pull up on the hook to make the loop slightly longer.
Yarn over again, insert the hook into the same stitch or space, yarn over, and pull through. Pull up on the hook to lengthen the loop.
Repeat this process twice, for a total of three yarn overs into the same stitch or space.
You should now have 6 loops on your hook.
Yarn over and pull through all 6 loops.
Chain 1 to secure the stitch.
Bean Stitch Pattern Breakdown
Now that you understand the basic stitch, let’s dive into the full pattern:
Foundation Chain: Start by chaining an odd number of stitches plus 2. For a sample swatch, chain 31.
Row 1: Insert your hook into the 3rd chain from the hook and complete the Bean Stitch.
Skip the next chain, then make a Bean Stitch in the following chain.
Repeat this process across the row until you reach the end.
Chain 2 and turn your work.
Row 2: Working into the left side of the first Bean Stitch, locate the triangle-shaped space on the left side of the stitch.
Insert your hook into the triangle space, pull up a loop, and work a Bean Stitch.
Repeat across, working a Bean Stitch in the space between each pair of Bean Stitches from the previous row.
Skip the last Bean Stitch, and work a Bean Stitch in the space between the final Bean Stitch and the chain-2 at the end of the row.
Chain 2, turn your work.
Repeat Row 2 until your project reaches the desired length.
Tips for Working the Bean Stitch
Adjust tension carefully: Since the Bean Stitch involves pulling loops to make them longer, it’s important to maintain even tension. If your loops are too tight, the stitch may look too compressed; if they’re too loose, the stitch could look sloppy.
Practice the triangle space: Finding the triangle space on the left side of the Bean Stitch can take some practice. Be sure to pull your work slightly to the left to see the space clearly.
Versatility: This stitch works well for textured afghans, dishcloths, or even cowls. Its dense texture makes it a good choice for cozy projects where warmth is important.
The Bean Stitch adds texture and uniqueness to your crochet projects, making it ideal for pieces that stand out. Whether you’re working on a large afghan or a simple scarf, the Bean Stitch is a beautiful option to consider. Try it in various yarn weights and colors to see how the texture changes and experiment with creating your own patterns using this lovely stitch.
Happy crocheting!
You might also be interested
You Are Here:
