Crochet, with its intricate patterns and cozy creations, has been a beloved craft for generations. Among the myriad of crochet stitches, the Corner-to-Corner (C2C) crochet stitch stands out as a versatile and visually appealing technique. Whether you’re a beginner or an experienced crocheter, mastering the C2C crochet stitch can add a new dimension to your creative repertoire. In this tutorial, we will explore the fundamentals of the C2C crochet stitch, guiding you step by step to create beautiful, textured projects.
Tutorial To Make C2C Crochet Stitch
Written byadmin in
Understanding the Basics: What is C2C Crochet?
The C2C crochet technique involves working in diagonal rows, starting from one corner and increasing your rows until you reach the desired width. After reaching the widest point, you begin decreasing the rows until you reach the opposite corner. This method creates a lovely textured fabric, perfect for blankets, scarves, and even garments.
In the Corner-to-Corner (C2C) crochet pattern, a variety of stitches are employed to create the distinctive texture and design. Contrary to what the name might suggest, C2C crochet encompasses more than just a specific stitch; it actually denotes a method where stitches are worked diagonally from one corner to another, incorporating both increasing and decreasing elements.
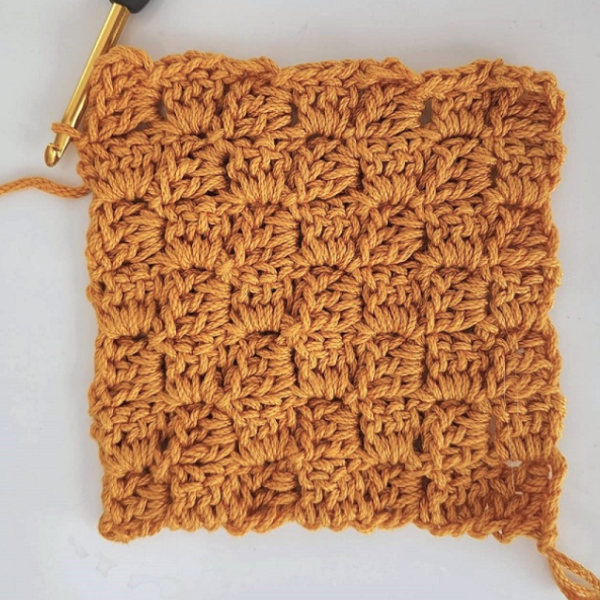
While the term ‘C2C crochet’ can be a bit misleading, it generally refers to the technique of stitching from corner to corner, incorporating both a growing and diminishing segment in the process. Specifically, the term is commonly associated with the boxed C2C stitch, which is constructed using individual “tiles.” These tiles are the building blocks of the C2C pattern, forming a visually appealing grid-like design.
Understanding the Basics: What is C2C Crochet?
The C2C crochet technique involves working in diagonal rows, starting from one corner and increasing your rows until you reach the desired width. After reaching the widest point, you begin decreasing the rows until you reach the opposite corner. This method creates a lovely textured fabric, perfect for blankets, scarves, and even garments.
Materials You Will Need:
- Yarn: Choose your favorite color or a combination of colors to add variety to your project.
- Crochet Hook: Select an appropriate hook size according to the yarn you’ve chosen.
- Scissors: For cutting yarn.
- Tapestry Needle: To weave in loose ends neatly.
Tutorial
Abbreviations (US)
ch – chain
dc – double crochet
space – space
ss – slip stitch
Let’s initiate the creation of the first “tile”.
Chain 6 stitches.
Row 1: Work 1 double crochet (dc) in the 4th chain from the hook, followed by 1 dc in the next 2 chains. Turn your work.
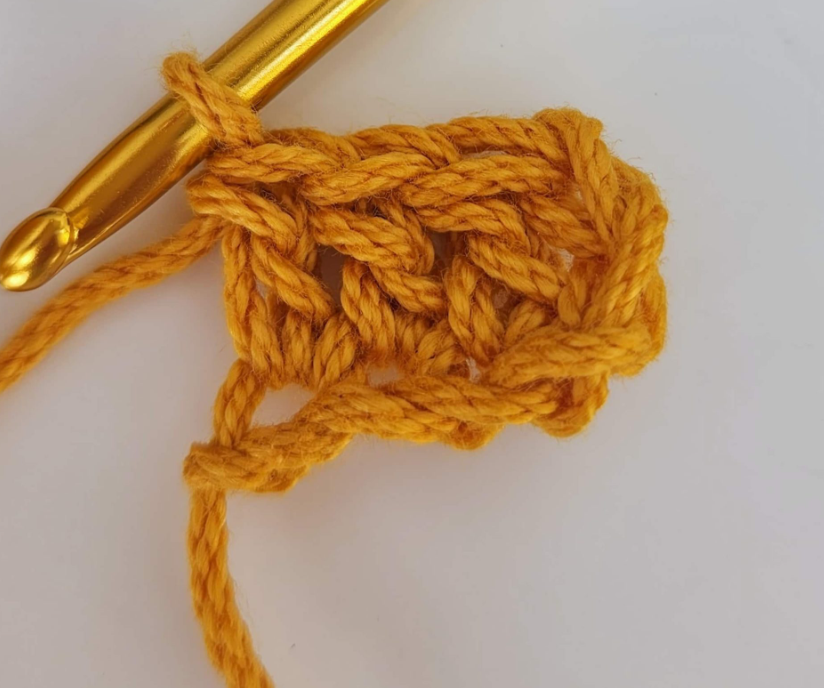
Row 1
Row 2: Chain 6 and ensure the tail is facing downward. Work 1 dc in the 4th chain from the hook, then 1 dc in the next 2 chains. Slip stitch to the chain-3 space (in the first tile), chain 3, and crochet 3 dc in the same chain-3 space. Turn your work.
Row 2
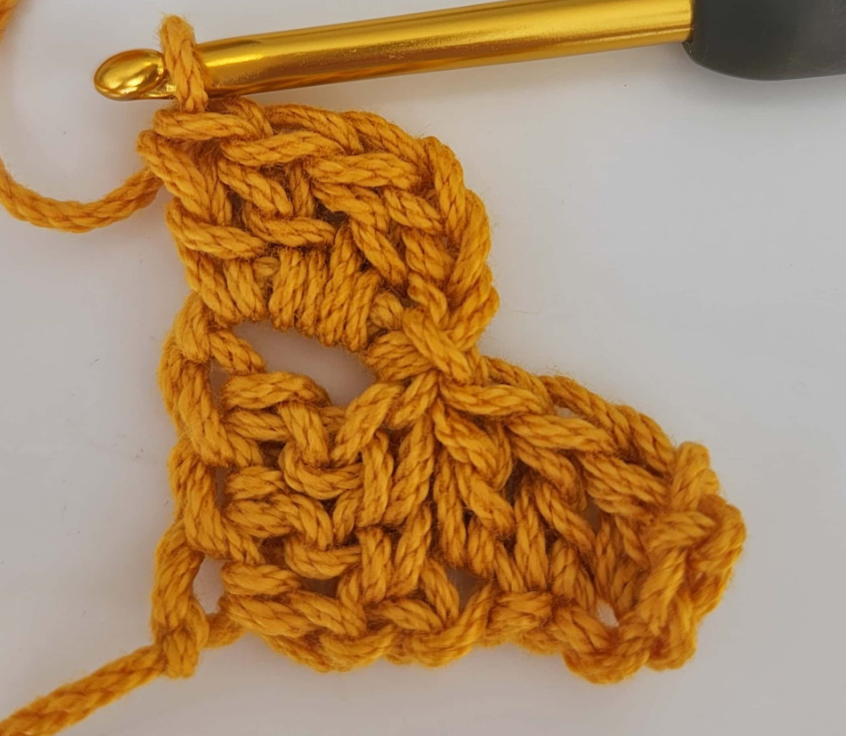
Row 3: Chain 6, work 1 dc in the 4th chain from the hook, and 1 dc in the next 2 chains. *Slip stitch to the chain-3 space (from the previous row), chain 3, and crochet 3 dc in the same chain-3 space; repeat from * until you reach the end of the row. Turn your work.
Row 3
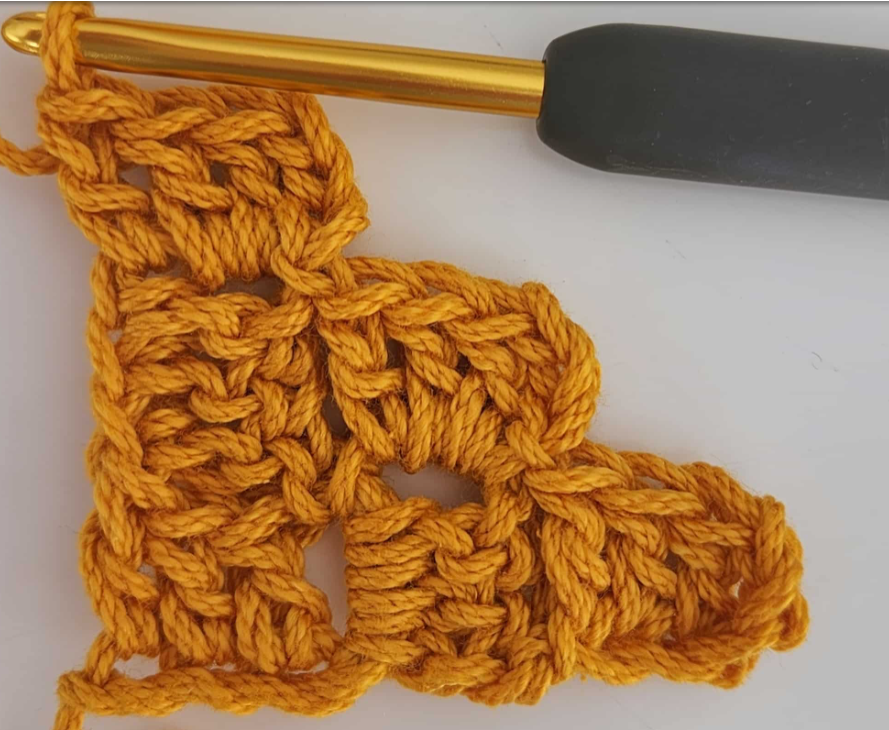
Row 4: Slip stitch into the last 3 dc you just worked and into the chain-3 space. *Chain 3, crochet 3 dc in the same chain-3 space, slip stitch to the chain-3 space (from the previous row); repeat from * until you reach the end of the row. Do not work a tile into the last chain-3 space. Turn your work.

Row 4
Continue repeating Row 4 until your square is complete, and your tile pattern will gradually expand, creating a visually appealing and intricate design.
Tips for Perfecting Your C2C Crochet:
- Tension Matters: Maintain consistent tension in your stitches to ensure an even and polished look.
- Color Placement: Experiment with color placement to create intricate patterns within your C2C project.
- Practice Makes Perfect: Like any other crochet technique, practice is key. Start with small projects like dishcloths before attempting larger items like blankets.
- Count Your Stitches: Regularly count your stitches and squares to avoid mistakes and maintain the symmetry of your project.
Video Tutorial
For those who prefer to learn through videos, I have an excellent suggestion. I recommend this comprehensive tutorial, especially created for visual learners who enjoy video content more than following written instructions. The video was made by the The Purple Poncho. You can find the video tutorial here.
Did you like this pattern and want to see more information about it? See the tutorial made by petalstopicots.com.
Access the Tutorial/ C2C Crochet Stitch Tutorial
The C2C crochet stitch opens up a world of creative possibilities for crocheters of all skill levels. Its unique texture and versatility make it a popular choice for various projects. With dedication, patience, and a bit of practice, you can master this technique and create stunning, heirloom-quality items for yourself and your loved ones. So, grab your yarn and hook, follow this tutorial, and embark on a journey into the delightful realm of C2C crochet. Happy crocheting!
You might also be interested
You Are Here: