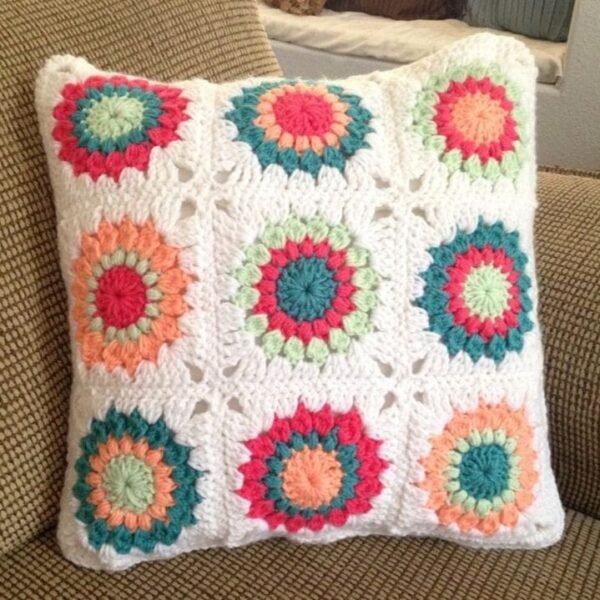
Creating a crocheted pillow can be a delightful and satisfying endeavor, allowing you to fashion a snug and ornamental addition to your living space. In this step-by-step guide, I will walk you through the process of crafting a basic square pillowcase using single crochet stitches. Don’t hesitate to personalize your project by choosing your favorite hues, yarn texture, and dimensions based on your preferences.
Wonderful Crochet Pillow Free Pattern
Written byadmin in
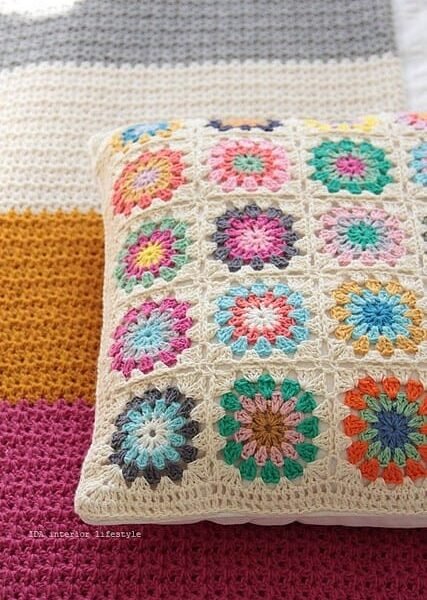
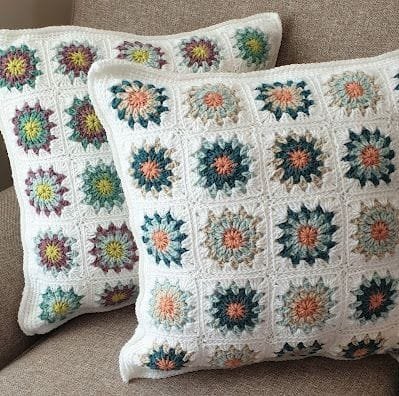
Crocheted pillows offer not only charm but also comfort. Employing soft and plush yarns yields pillows that are ideal for cuddling on the sofa or enhancing the coziness of your bed. The intricate texture of crochet stitches adds a warm and inviting ambiance, capable of transforming any room into a sanctuary of comfort.
Materials You’ll Need:
Yarn: Opt for yarn in your preferred colors. Worsted weight yarn is a practical choice for pillows due to its durability and ease of use.
Crochet Hook: Select an appropriate hook size based on the yarn you’ve chosen; the yarn label usually provides a recommended hook size.
Pillow Form/Insert: Acquire a pillow form or insert in the desired size for your finished pillow cover.
Yarn Needle: Essential for weaving in loose ends and stitching the pillow cover together.
Scissors: To cut the yarn as needed.
Stitch Markers (optional): These can be handy for keeping track of your stitches and rounds.

Abbreviations:
ch: Chain
sc: Single Crochet
sl st: Slip Stitch
st(s): Stitch(es)
Step-by-Step Instructions:
FIRST MOTIF
Begin by using Color 1. Create a chain of 4 (ch 4) and join it with a slip stitch (slip st) in the first chain to form a ring.
Round 1: Chain 3 (counting as the first double crochet or dc here and throughout), then work 11 dc into the ring. Join with a slip stitch in the top of the beginning ch-3, resulting in a total of 12 dc. Fasten off Color 1 and join Color A between the first and last dc of round 1.
Round 2: Switch to Color 2. Chain 3, and work a dc in the same space. Then, work 2 dc between the next 2 dc. Repeat this pattern around, joining with a slip stitch in the top of the beginning ch-3. This round will have a total of 24 dc. Fasten off Color 2 and join Color 3 between the first and last dc of round 2.
Round 3: Use Color 3. Chain 3, then work 2 dc in the same space. Skip the next 2 dc, and work 3 dc between the last skipped dc and the next dc. Continue repeating this pattern around and join with a slip stitch in the 3rd chain of the beginning ch 4. This round will consist of 36 dc. Fasten off Color 3 and join Color 4 between the first and last dc of round 2.
Round 4: Now, with Color 4, chain 3. In the same space, work (2 dc, ch 1, 3 dc). [Then, chain 1, skip the next 3 dc, and work 2 dc between the last skipped dc and the next dc] twice. Chain 1, skip the next 3 dc, and work (3 dc, ch 1, 3 dc) between the last skipped dc and the next dc. Repeat this pattern twice and then from * to ** once. Finally, join with a slip stitch in the top of the beginning ch-3. This round will create 4 corner ch-1 spaces and 9 dc on each side. Fasten off.
SECOND MOTIF (joining across one side) Create the second motif following the same pattern as the First Motif. While completing round 4, replace the ch-1 spaces on the side to be joined with single crochets (sc) in the corresponding ch-1 space(s) on the preceding motif(s), following the assembly diagram for proper placement. Fasten off.
BORDER
Round 1: With the right side facing, join Color A with a slip stitch in any corner ch-1 space. Chain 1, then work 2 sc in the corner ch-1 space, and sc in each stitch and space across. Repeat this pattern around and join with a slip stitch in the first sc. This round will result in 56 sc on each side.
Round 2: Chain 1, then work 2 sc in each sc, and sc in each sc up to the next corner. Repeat this pattern around and join with a slip stitch in the first sc.
Round 3: Chain 1, sc in the first sc, work 2 sc in the next sc, and sc in each sc up to the next corner. Repeat this pattern around and join with a slip stitch in the first sc. Fasten off.
FINISHING
Using a sewing needle and matching thread, sew the pillow cover to the top of the pillow, following the assembly diagram for guidance.
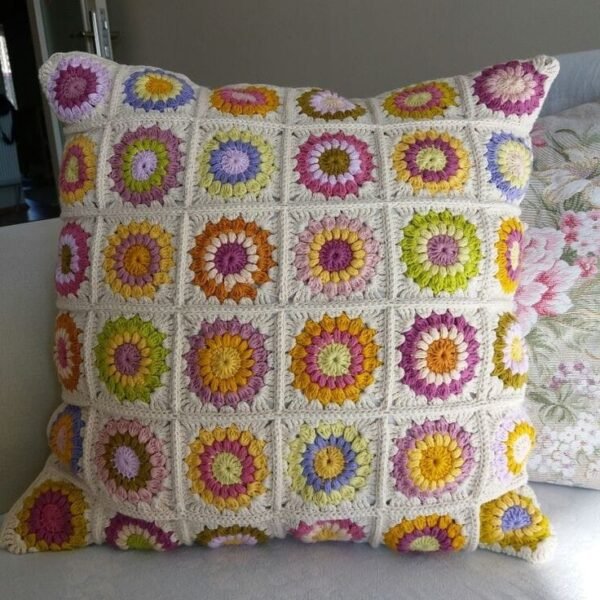
Wonderful Crochet Pillow
Well done! You’ve completed your crocheted pillow cover. Don’t hesitate to explore various stitch patterns, color combinations, and decorative additions to craft a one-of-a-kind pillow that reflects your personal style.
Did you like this pattern and want to see the PDF about it? See the tutorial made by yarnspirations.com.
Access the PDF/ RED HEART COPENHAGEN PILLOW
The My Crafts Inspirations team would like to thank each reader for following us this far, we wish you much success with this wonderful pattern and we hope to help you with our next crochet suggestion. To the next!
You might also be interested
You Are Here: