In this tutorial, you’ll find detailed instructions, stitch abbreviations, and tips to guide you through the process. Get ready to crochet your way to a masterpiece as we break down each step of this delightful pattern!

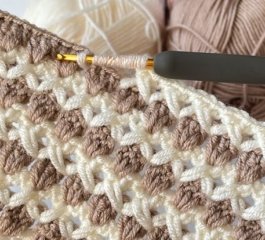
Crochet Diamond Square Pattern
Abbreviations
Before diving into the pattern, familiarize yourself with these standard crochet abbreviations:
- ch – chain
- sl st – slip stitch
- dc – double crochet
- sp – space
- st(s) – stitch(es)
Materials Needed
Yarn in two contrasting colors (A and B)
Crochet hook suitable for your yarn weight
Scissors
Tapestry needle for weaving in ends
Pattern Instructions
Round 1 (With A):
Make a magic ring.
Into the magic ring: Ch 2, [3 dc, ch 1] – repeat four times.
Pull the tail to close the ring.
Join with sl st to the top of the first dc.
Round 2 (Attach B):
Sl st into the next three stitches and into the ch-1 space.
Attach color B. Ch 2, then work 3 dc, ch 1, 3 dc into the same space.
Skip the next 3 dc, and in the next ch-1 space, work [3 dc, ch 1, 3 dc] – repeat from * three more times.
Join with sl st to the top of the first dc.
Tip: Carry color A along the edge, so you can easily switch colors when needed.
Round 3:
Ch 2, and in the space between corners, work 3 dc.
Switch to color A and work 3 dc, ch 1, 3 dc in the ch-1 space.
Switch to color B and work 3 dc in the space between corners.
Repeat this sequence around the square: alternate colors between spaces and corners.
Join with sl st to the top of the first dc.
Round 4:
Ch 2, and in the same space, work 3 dc.
Skip the next 3 dc, and in the next space, work 3 dc.
Switch to color B and work 3 dc, ch 1, 3 dc in the ch-1 space.
Switch to color A and repeat the sequence:
Skip the next 3 dc and work 3 dc in the following space.
Alternate colors in corners and spaces.
Join with sl st to the top of the first dc.
This tutorial is designed to guide you step-by-step through a simple yet stunning crochet pattern, ensuring you feel confident and inspired to create something truly unique.
ACCESS FREE CROCHET HERERound 5:
Ch 2, and in the same space, work 3 dc.
Switch to color A, skip the next 3 dc, and work 3 dc in the next space.
Switch to color B, skip the next 3 dc, and work 3 dc in the next space.
Continue alternating colors until you reach the corners, where you’ll work 3 dc, ch 1, 3 dc.
Repeat this sequence around the square: alternate colors and stitches for a balanced design.
Join with sl st to the top of the first dc.
Tip: For the final round, cut both colors and weave in the ends securely.
Congratulations! You’ve completed the Crochet Diamond Square. Block your square to enhance its shape and make it easier to join with other motifs.
For a visual guide, be sure to check out my video tutorial [link to video tutorial]. It demonstrates how to seamlessly join the last round and offers additional tips for color transitions.
Start your Crochet Diamond Square project today, and let your creativity shine! Don’t forget to share your creations with us at My Crafts Inspirations. Happy crocheting!