The Spiderweb Baby Blanket combines tidy rows of double crochet with airy, web-like motifs. Small sections of single crochet and taller treble stitches shape the openwork, giving the fabric a decorative rhythm that stands out beautifully in a solid color.
Spiderweb Baby Blanket Free Pattern
Written byadmin in
This design is a lovely project for crocheters who enjoy following a repeating stitch sequence. Each motif develops over several rows, with solid sections framing the open spaces. Once you become familiar with the eleven-row repeat, you can follow the same sequence to extend the blanket to your preferred length.
Below, you will find the supplied sizing information, gauge, stitch abbreviations, and complete row-by-row instructions, with clearer wording and notes to help you keep the pattern aligned.
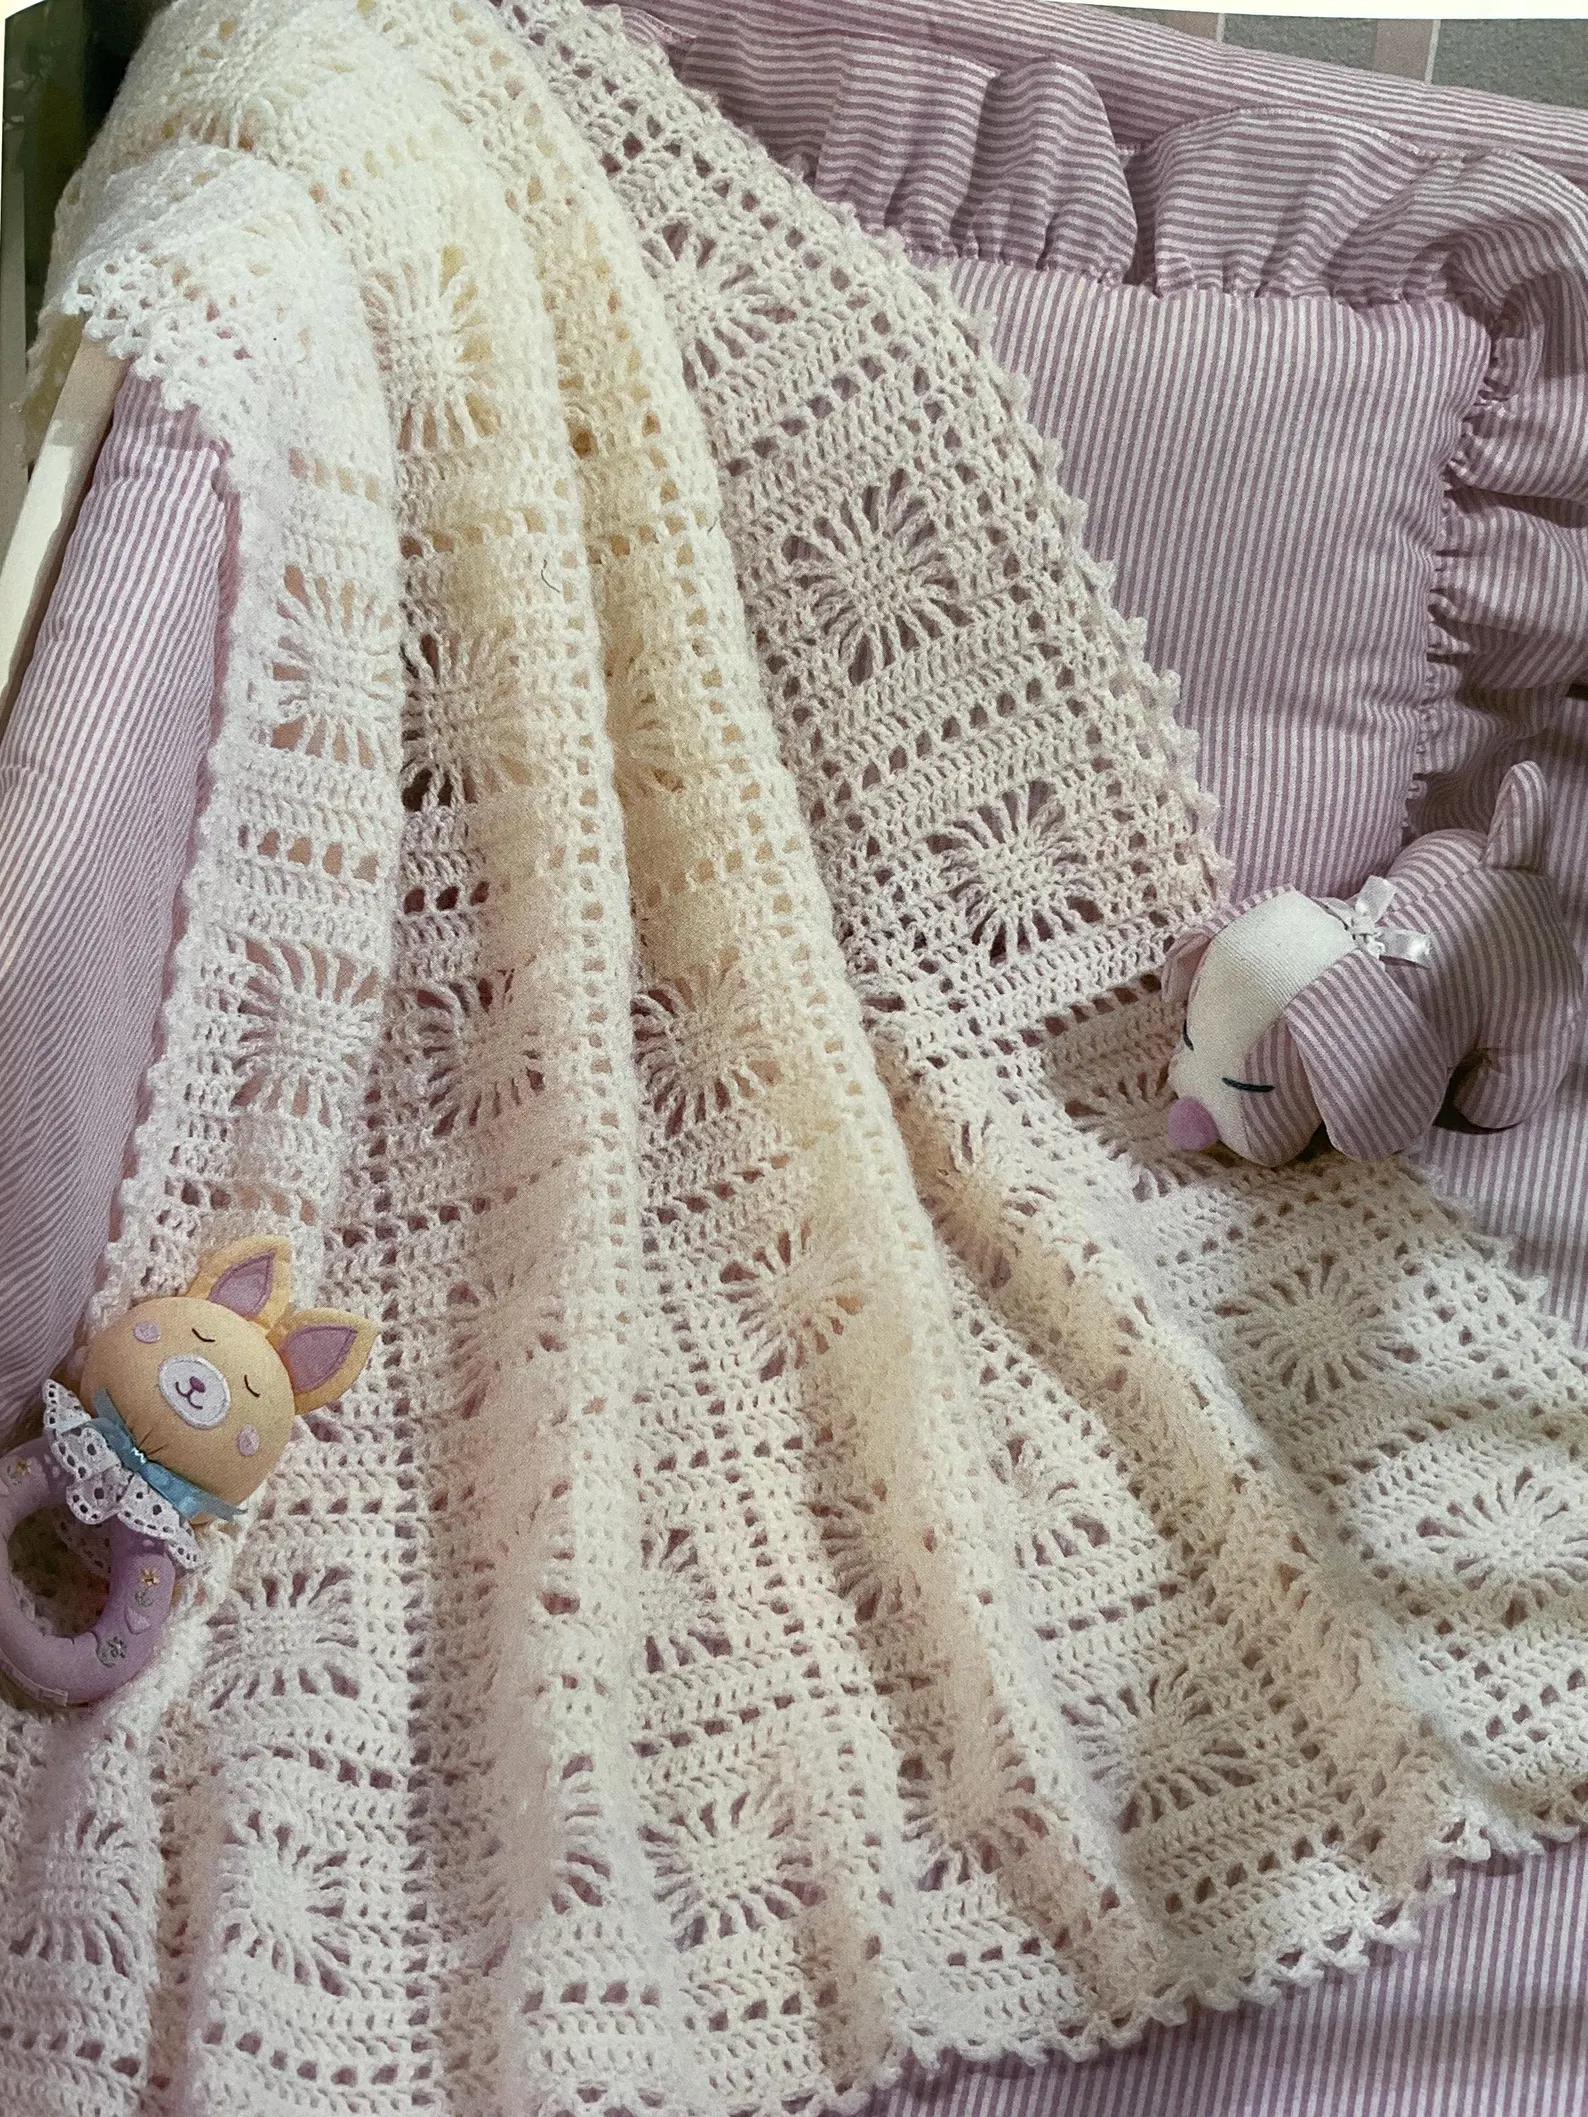
Spiderweb Baby Blanket Free Pattern
Finished Size and Sizing Notes
Listed finished size: 35 inches wide by 52 inches long, approximately 89 × 132 cm.
Sizing clarification: The supplied instructions list these dimensions, but the stated sequence contains 59 rows in total, and its finished measurements have not been verified. Use the listed size as a target and measure your actual fabric as you work. The double crochet gauge alone does not establish the height of the mixed-stitch openwork repeat.
Repeating Rows 3–13 adds length, measured away from the foundation chain. To make the blanket longer, work additional complete repeats, then finish with the two closing rows provided below, which are the same as Rows 3 and 4.
To change the width, adjust the starting chain in multiples of 16. The stitch structure gives a starting-chain formula of 16 × the number of motif panels + 9. The supplied chain of 137 creates eight panels. Swatch any size adjustment before beginning the full blanket.
Gauge
16 double crochet stitches and 10 rows = 4 inches (approximately 10 cm).
Make a double crochet swatch to check the stated gauge, then work a small sample of the motif to assess its width, height, and drape. Measure the swatch after washing and drying it according to the yarn label.
Materials to Prepare
- Yarn in your preferred color.
- A crochet hook that produces the stated gauge with your chosen yarn.
- Stitch markers or short pieces of contrasting yarn.
- Scissors and a yarn needle for finishing.
The supplied pattern does not specify yarn weight, hook size, or yarn quantity. These need to be established from your yarn choice and swatch before planning the full project.
Abbreviations and Skills
This pattern uses US crochet terminology.
| Abbreviation | Meaning |
|---|---|
| ch | Chain; work the number indicated, such as ch 1 or ch 3 |
| sc | Single crochet |
| dc | Double crochet |
| tr | Treble crochet, also called triple crochet |
| st / sts | Stitch / stitches |
| sp | Space |
| ch-1 sp | The space beneath a chain-1 |
| RS | Right side |
You should be comfortable working into both stitches and chain spaces, skipping stitches, turning your work, and following repeated groups of instructions.
Pattern Notes
- The beginning ch 3 counts as the first dc of each row.
- At the end of each row, include the top of the previous row’s turning chain when working the last three dc.
- Square brackets enclose a group of instructions to repeat across the row. Parentheses identify a smaller sequence to work the stated number of times.
- In Rows 3–13, the separating ch 1 bridges the chain-1 space between adjacent panels. Leave that space unworked unless a row specifically tells you to work into it.
- Work one stitch into each indicated stitch. For example, “sc in the next 4 tr” means one sc in each of those four tr.
- Mark the right side after completing Row 2.
Spiderweb Baby Blanket Crochet Pattern
Foundation
Loosely chain 137. Keep the foundation relaxed so the bottom edge does not pull inward.
Row 1
Work 1 dc in the fourth ch from the hook and 1 dc in each remaining ch across.
Count: 135 stitches, including the three skipped starting chains as the first dc. This consists of 134 worked dc plus the starting chain-3.
Row 2 — Right Side
Ch 3 and turn. Dc in the next 2 dc.
Repeat [ch 1, skip the next dc, dc in the next 15 dc] until 4 dc remain.
Ch 1, skip the next dc, and dc in the last 3 dc.
Place a stitch marker or a short piece of contrasting yarn on the face of this row to identify the right side.
Row 3
Ch 3 and turn. Dc in the next 2 dc, then ch 1.
Repeat [dc in the next dc, (ch 1, skip the next dc, dc in the next dc) 7 times, ch 1] until only the final 3 dc remain.
Dc in the last 3 dc.
Row 4
Ch 3 and turn. Dc in the next 2 dc, then ch 1.
Repeat [dc in the next dc, (dc in the next ch-1 sp, dc in the next dc) 7 times, ch 1] until only the final 3 dc remain.
Dc in the last 3 dc.
Row 5
Ch 3 and turn. Dc in the next 2 dc, then ch 1.
Repeat [dc in the next 15 dc, ch 1] until only the final 3 dc remain.
Dc in the last 3 dc.
Row 6
Ch 3 and turn. Dc in the next 2 dc, then ch 1.
Repeat [dc in the next 3 dc, ch 3, (skip the next dc, tr in the next dc) 4 times, ch 3, skip the next dc, dc in the next 3 dc, ch 1] until only the final 3 dc remain.
Dc in the last 3 dc.
Row 7
Ch 3 and turn. Dc in the next 2 dc, then ch 1.
Repeat [dc in the next 3 dc, ch 3, sc in the next 4 tr, ch 3, dc in the next 3 dc, ch 1] until only the final 3 dc remain.
Dc in the last 3 dc. Leave the ch-3 spaces unworked.
Rows 8–10
Work the following instructions on each of these three rows:
Ch 3 and turn. Dc in the next 2 dc, then ch 1.
Repeat [dc in the next 3 dc, ch 3, sc in the next 4 sc, ch 3, dc in the next 3 dc, ch 1] until only the final 3 dc remain.
Dc in the last 3 dc. Leave the ch-3 spaces unworked.
Row 11
Ch 3 and turn. Dc in the next 2 dc, then ch 1.
Repeat [dc in the next 3 dc, ch 1, (tr in the next sc, ch 1) 4 times, dc in the next 3 dc, ch 1] until only the final 3 dc remain.
Dc in the last 3 dc. Leave the previous row’s ch-3 spaces unworked.
Row 12
Ch 3 and turn. Dc in the next 2 dc, then ch 1.
Repeat [dc in the next 3 dc, dc in the next ch-1 sp, (dc in the next tr, dc in the next ch-1 sp) 4 times, dc in the next 3 dc, ch 1] until only the final 3 dc remain.
Dc in the last 3 dc. Each motif panel now contains 15 dc again.
Row 13
Ch 3 and turn. Dc in the next 2 dc, then ch 1.
Repeat [dc in the next 15 dc, ch 1] until only the final 3 dc remain.
Dc in the last 3 dc.
Continue the Blanket
After completing Row 13, repeat Rows 3–13 four more times, as directed in the supplied pattern. This produces 57 rows before the two closing rows.
Check the blanket’s length. If you want a longer blanket, continue repeating the complete Rows 3–13 sequence. Always end a full repeat on Row 13 before working the closing rows, and allow for the height of those final two rows when measuring.
Closing Rows
Final Row 1 — Repeat of Row 3
Ch 3 and turn. Dc in the next 2 dc, then ch 1.
Repeat [dc in the next dc, (ch 1, skip the next dc, dc in the next dc) 7 times, ch 1] until only the final 3 dc remain.
Dc in the last 3 dc.
Final Row 2 — Repeat of Row 4
Ch 3 and turn. Dc in the next 2 dc, then ch 1.
Repeat [dc in the next dc, (dc in the next ch-1 sp, dc in the next dc) 7 times, ch 1] until only the final 3 dc remain.
Dc in the last 3 dc. Fasten off, leaving a tail for weaving in.
Finishing Your Blanket
Use a yarn needle to weave in the starting and finishing tails securely. Wash and dry the blanket according to the yarn manufacturer’s instructions, gently arranging it into shape as appropriate for the fiber. Avoid stretching the openwork aggressively, and measure the finished piece once it is dry.
A solid shade keeps the web-like motifs easy to see. Ivory, pale pink, soft lilac, or light blue would each give this design a gentle look. For a stronger contrast between stitches and open spaces, try a deeper shade and let the repeating pattern provide the decoration.
As you crochet, check the three-stitch side edges and the fifteen-dc panels on the solid rows. Keeping those sections aligned will help you catch a missed stitch before moving into the next openwork repeat. The result is a handmade blanket with an engaging stitch rhythm and a delicate, decorative finish.
You might also be interested
You Are Here: