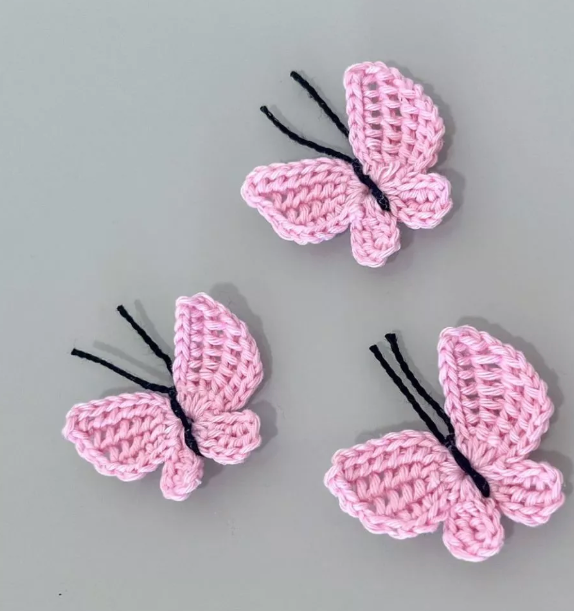
Crochet enthusiasts who love experimenting with different techniques will find the Tunisian Butterfly Crochet a delightful project. Tunisian crochet, also known as Afghan crochet, creates a unique fabric with a beautiful texture. This pattern is designed to create an intricate butterfly using Tunisian crochet stitches, making it a great decorative piece or embellishment for your other projects.
Tunisian Butterfly Crochet Pattern
Tunisian crochet is a hybrid technique that combines elements of both knitting and traditional crochet. The fabric produced is dense yet flexible, perfect for making decorative motifs like this delicate butterfly. If you’ve never tried Tunisian crochet before, this small project is a great introduction.
Tunisian Butterfly Crochet Pattern
Materials Needed:
- DK or worsted weight yarn (any color of your choice)
- Tunisian crochet hook (size appropriate for your yarn)
- Scissors
- Tapestry needle

Tunisian Butterfly Crochet Pattern
Abbreviations:
Ch–Chain
Sl st – Slip stitch
YO – Yarn over
MR – Magic ring
Pattern Instructions:
Row 1:
Start with a Magic Ring, then chain 8.
Insert hook and pull up a loop (insert hook in the back loops only). Leave the loop on the hook.
Continue to pull up a loop until you have 8 loops on the hook.
Insert hook into the middle of the Magic Ring and pull up a loop. Now, you should have 9 loops on the hook.
Yarn over and pull through 2 loops at a time until only 1 loop remains on the hook.
Insert hook, pull up a loop, and make a slip stitch.
Row 2:
Repeat the same steps as Row 1 until you have 8 loops on the hook.
Yarn over, pull through 2 loops at a time until 1 loop remains.
Insert hook, pull up a loop, and make a slip stitch.
Row 3:
Repeat the same steps as Row 1 until you have 7 loops on the hook.
Yarn over, pull through 2 loops at a time until 1 loop remains.
Insert hook, pull up a loop, and make a slip stitch.
Row 4:
Repeat the same steps as Row 1 until you have 6 loops on the hook.
Yarn over, pull through 2 loops at a time until 1 loop remains.
Close the top wing with a slip stitch in the next 4 stitches.
Insert hook in the middle of the Magic Ring and make a slip stitch.
Congratulations! The top wing of your butterfly is complete. You can repeat the steps to create the lower wings or customize the butterfly to your preference
Finishing Touches
Once you have completed the butterfly, weave in the loose ends using a tapestry needle. You can attach your butterfly to blankets, scarves, or even turn it into a brooch by adding a pin backing.

Tunisian Butterfly Crochet Pattern
Final Thoughts
Tunisian crochet opens up a world of possibilities for textured and creative designs. This Tunisian Butterfly Crochet Pattern is a simple yet elegant project that you can use to enhance your crochet creations. Whether you’re a beginner or an experienced crocheter, this pattern is a fun way to practice Tunisian stitches.
Give it a try and share your beautiful butterflies with fellow crochet lovers!
You Are Here:
