Pumpkin, chestnut, and wheat look lovely together in a basket of yarn, but where you place each color can change the whole look of a blanket. A narrow strip of pumpkin beside cream catches the eye. Set that same pumpkin beside rust, and the two shades blend into a softer band. The Crochet Autumn Log Cabin Throw Pattern gives you a chance to play with those small decisions, one strip at a time.
Crochet Autumn Log Cabin Throw Pattern
Written byadmin in
The design takes its name from the log cabin quilt block. Strips of fabric, traditionally called logs, build outward around a small center. In crochet, rows of yarn create that same stepped geometry, with the added texture of the stitches. You’ll find the free PDF with the complete pattern at the end of this article.
A good place to start is with three colors that differ in lightness. Try oatmeal for the lightest shade, copper for the middle, and walnut brown for the darkest. Lay a strand of each across the others before you commit. Two colors that look quite different in the skein can be surprisingly close once they’re worked into narrow strips.
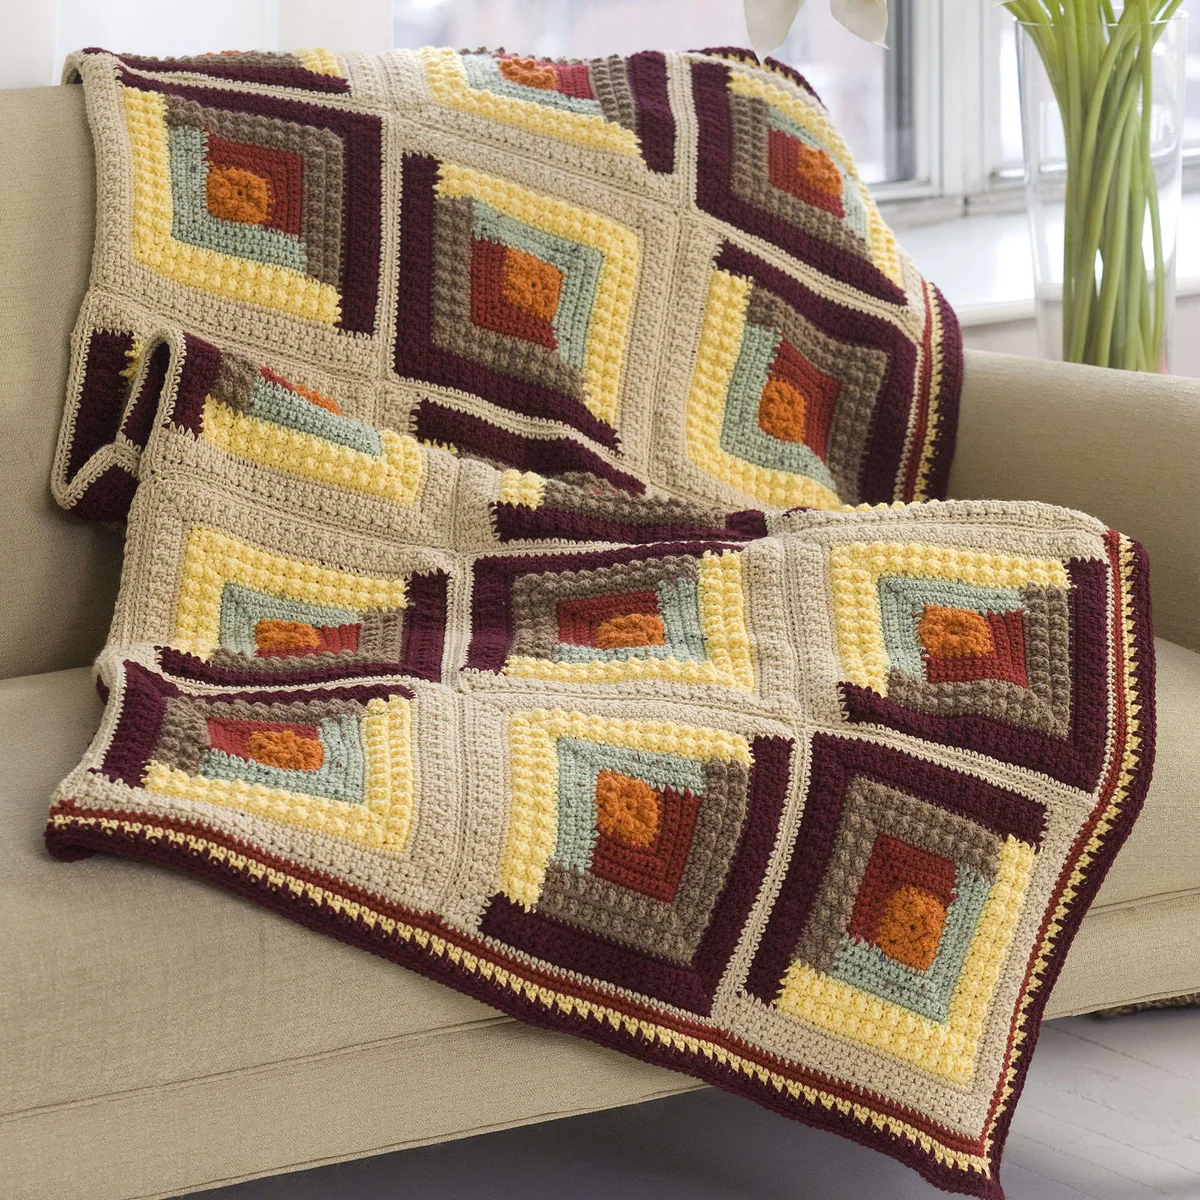
For a quieter throw, try cream, dusty olive, and warm taupe, with a little russet near the center. If you love the brighter side of fall, use marigold or pumpkin for one of the shorter logs. A vivid color near the center takes up only a small area, but the surrounding strips draw your eye back to it. That makes the center a particularly good home for a favorite yarn you have only a little of.
Getting a straight start on each log
One of the trickier parts of log cabin crochet is beginning a strip along the side of earlier rows. The top of a crochet stitch has a recognizable V, but a row end looks different depending on which stitch was used and which side is facing you. Before you begin a new log, lay the work flat and identify exactly where the strip starts and ends. A removable marker in each corner makes those points much easier to find.
When the pattern gives you a pickup count for a long edge, mark the midpoint as well. For example, if an edge needs 40 stitches, aim to have 20 worked by the midpoint. You’ll notice an uneven pickup while there’s still time to adjust it, and the last inch of the strip won’t end up crowded with extra stitches. After the first row, smooth the piece on a table. A rippling edge can indicate too many pickups, while an edge that draws inward can indicate too few.
Keeping track as the throw grows
The first few color changes are easy to remember. A few evenings later, it’s surprisingly easy to pick up the blanket and start on the wrong edge. Keep a marker on the right side of the work and, when you put the project down, clip a second marker where the next strip begins. If you’re using similar shades such as cinnamon and copper, tape a short strand of each beside its color name on your printed pattern.
It also helps to check the straight edges before adding another log. A missed stitch at the end of one row may be hard to see in a textured yarn, but the next strip will follow that little dip. Count the final row, check both corners, and then join the new color. Those quick checks are especially worthwhile on the outer logs, where undoing a single row means unraveling a much longer stretch of crochet.
Giving the throw a neat finish
Color changes leave yarn tails in several parts of a log cabin design. Weave each tail through stitches of the same shade whenever possible, particularly where a dark brown meets a pale cream. Turn the work over and look at the front before trimming. A dark strand that seems hidden on the back can show through a light stitch when the blanket is lifted.
Once the ends are secure, lay the finished throw flat and ease the corners into shape, following the care instructions for your yarn. This is also a lovely moment to see what your color choices have done. Fold the throw over the back of a chair and only a few bands of autumn color are visible. Spread it across your lap and you can follow each log all the way back to the center.
Download the free Crochet Autumn Log Cabin Throw Pattern
The complete pattern is available in the free PDF below. Keep a copy beside your yarn so you can refer to the strip sequence and mark each section as you finish it.
If you’re deciding between two color arrangements, wrap the yarns around a piece of cardboard in the order you plan to use them. Make the wraps wider for broad bands and narrower for accent strips. Then set the card on the sofa and look at it from across the room. You might find that a thin line of golden ochre between chestnut and olive gives each color just enough definition.
free Crochet Autumn Log Cabin Throw Pattern
A log cabin throw is also a lovely way to use leftover yarn. Weigh each partial skein before and after crocheting a strip, then jot down its length and how many grams it used. If a later strip is about twice as long, the same width, and worked in the same stitch, you can expect it to take roughly twice as much yarn. That little note can help you decide whether your remaining cinnamon yarn will stretch to an outer log or is better saved for a shorter section.
When choosing a yarn for this throw, think about how it will feel folded over your knees. Crochet a small swatch in the stitch used for the logs, wash it according to the yarn label, and let it dry before choosing your hook size. Lay the swatch over your hand and see how readily it bends. For a lap blanket, you want enough softness for the fabric to settle around you while the corners of each log still hold their shape.
You might also be interested
You Are Here: