There’s something incredibly charming about tiny handmade birds. Whether you’re decorating your home, creating a nursery mobile, adding a unique touch to a gift, or making adorable ornaments, these little crochet birds are quick to stitch and full of personality.
Little Crochet Bird Pattern
Written byadmin in
This project is perfect for crocheters who enjoy amigurumi and small decorative pieces. With simple shaping techniques and only a few materials, you’ll create a sweet bird featuring textured wings, a tiny beak, and a cute tail. Once completed, you can display them individually, attach them to wreaths, use them as ornaments, or even create an entire flock in different colors.
Materials
Worsted weight yarn in the main color
Small amount of yarn for the beak and feet
3.5 mm crochet hook (or size needed to obtain a firm fabric)
Polyester fiberfill
Tapestry needle
Safety eyes or black beads
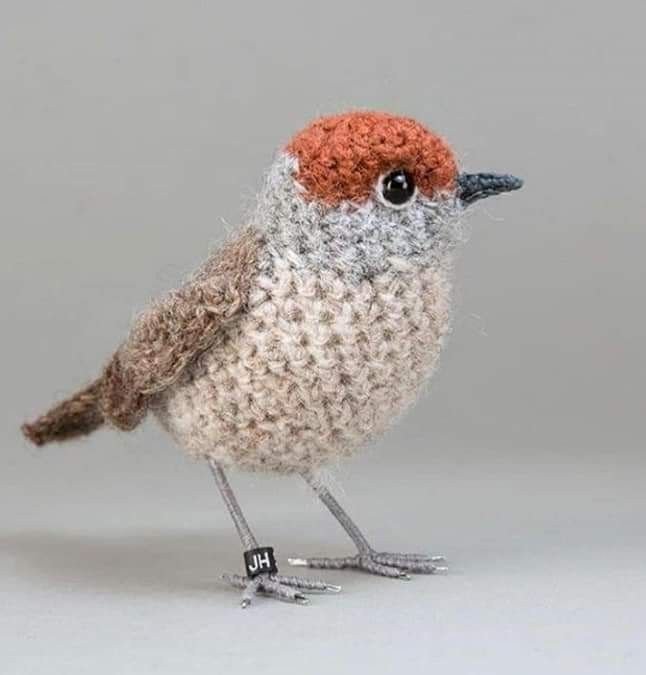
Little Crochet Bird Pattern
Skill Level
Intermediate
Finished Size
Approximately 4–5 inches (10–13 cm) long, depending on yarn and hook size.
Crochet Abbreviations
MR – Magic Ring
ch – Chain
sl st – Slip Stitch
sc – Single Crochet
dc – Double Crochet
tr – Treble Crochet
inc – Increase (2 stitches in the same stitch)
dec – Decrease
st(s) – Stitch(es)
Head and Body
Using the main color:
Round 1
Create a magic ring and work 6 sc into the ring.
Round 2
Increase in every stitch. (12 sts)
Round 3
(Inc, sc) around. (18 sts)
Round 4
(Inc, 2 sc) around. (24 sts)
Rounds 5–7
Work even without increasing.
Round 8
(Dec, 2 sc) around.
Continue
Continue shaping the body by working several rounds without increases before gradually decreasing toward the tail. Stuff the body firmly before closing the opening.
Right Wing
Using the main color:
Begin with a magic ring of 6 stitches.
Work the increases to create an oval wing shape.
After completing the wing:
- Chain 8.
- Work single crochet stitches evenly along the chain.
- Turn your work.
- Continue crocheting around the edge of the wing.
- Repeat the shaping rows until the wing has a smooth rounded appearance.
- Fasten off, leaving a long tail for sewing.
Left Wing
Make a second wing exactly the same as the first.
When attaching it to the body, position it on the opposite side so the wings mirror one another.
Tail
Chain 12.
Work back and forth in rows to create the tapered tail shape.
After completing the rows:
- Rotate the work.
- Crochet evenly around the outside edge.
- Join with slip stitches where instructed.
- Fasten off, leaving a long tail for sewing.
Beak
Using the beak color:
Work directly onto the front of the head to create a small triangular beak.
Fasten off, leaving enough yarn for weaving in the ends.
Feet (Make 2)
Using the beak color:
Crochet directly onto the underside of the bird.
Work a few stitches to form each foot, then fasten off securely.
Assembly
- Stuff the body firmly with polyester fiberfill.
- Sew the wings to each side of the body.
- Attach the tail to the back.
- Insert or sew the safety eyes.
- Weave in all yarn ends.
- Shape the bird gently with your hands.
Customization Ideas
One of the best things about this little bird pattern is how easy it is to personalize. Try making a colorful collection by using different yarn shades for each bird, or add tiny embroidered details to make every one unique.
These birds also make wonderful:
- Christmas tree ornaments
- Spring decorations
- Nursery mobiles
- Handmade gifts
- Keychains
- Bag charms
- Shelf decorations
Helpful Tips
- Use a slightly smaller crochet hook than recommended for your yarn to create a firm fabric that prevents stuffing from showing.
- Add stuffing gradually while crocheting for a smoother shape.
- Position the eyes before fully stuffing the body to achieve the cutest expression.
- Steam blocking is not necessary, but gently shaping the finished bird will enhance its appearance.
This adorable crochet bird is a delightful project that works up quickly and makes a wonderful handmade gift or decorative piece. Its simple construction and charming design make it suitable for confident beginners and experienced crocheters alike. Once you’ve made one, you’ll probably want to create an entire flock in different colors and styles to decorate your home throughout the year.
You might also be interested
You Are Here: